Databases
- # Creating Databases
- # Database Setup
- # Database Users and Credentials
- # Connection Strings
- # Entity Framework Migrations
- # Running migrations on app startup
- # Generating sql scripts
- # Connecting to Database VIA GUI Client
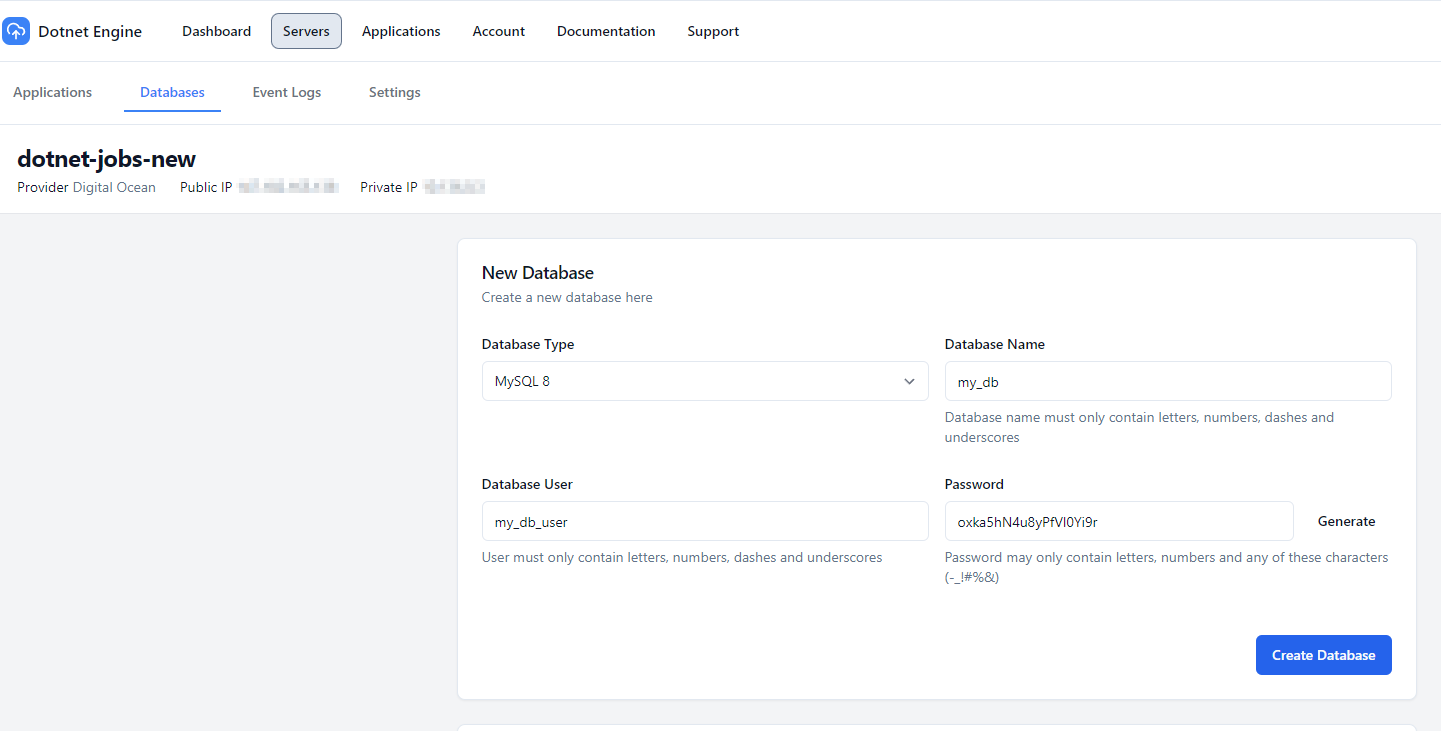
Creating Databases
You can create a database through the server’s Databases tab. Once installed, you will then be able to manage your database via Dotnet Engine.
The following databases are supported:
- Mysql 8.0
- PostgreSQL 15
Database Setup
Dotnet Engine will setup your database via a Docker container. You can create multiple databases on a server. Each one will be ran in seperate containers independent from each other.
It can take up to 5 minutes for your database container to start. You will know it’s complete when the databases status changes to Online.
Database Users and Credentials
The database username and password will be displayed after submitting the form and also emailed to you.
This is the last time your database password will be shown. It is advised to store your credentials in a secure password manager.
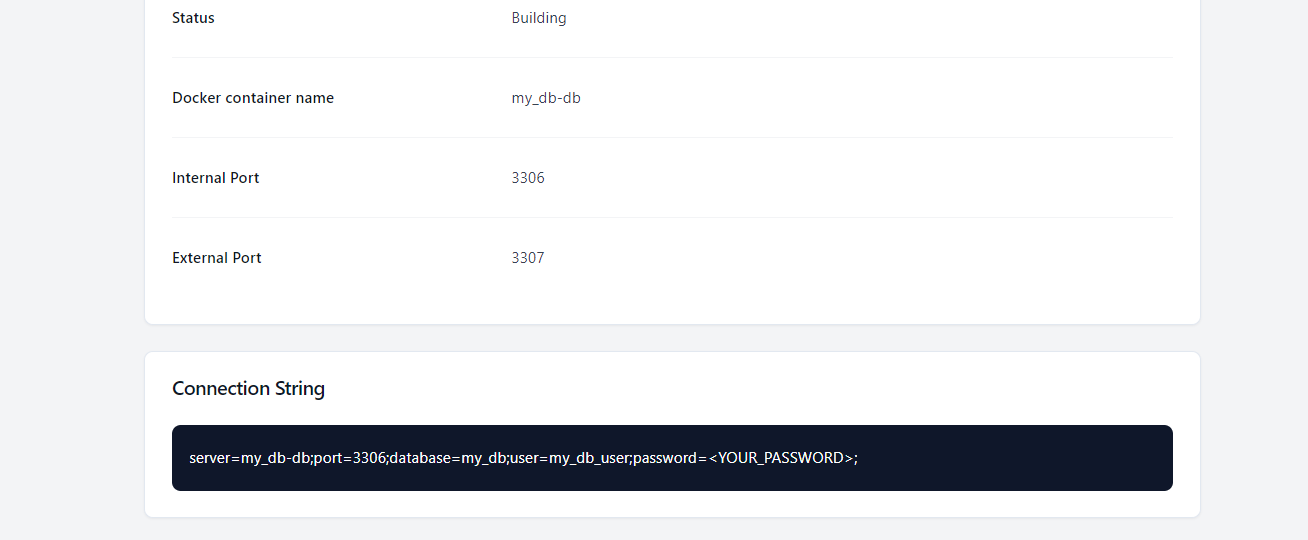
Connection Strings
You can see a preview of your databases connection string on your servers database page.
Entity Framework Migrations
If your using Entity Framework migrations, you have 2 options to apply them to your database created by Dotnet Engine.
Running migrations on app startup
The easiest way to apply migrations to your database is adding the following code to your Program.cs file.
...
var app = builder.Build();

using (var scope = app.Services.CreateScope())
{
    var db = scope.ServiceProvider.GetRequiredService<DbContext>();
    db.Database.Migrate();
}
This will run any outstanding migrations when you deploy your application in Dotnet Engine.
Generating sql scripts
You can generate an sql script from your migrations by running the following command locally:
dotnet ef migrations script -o myscript.sqlThis will build a SQL script that you can run against your database. To access your database via GUI client to run your script, see the section below.
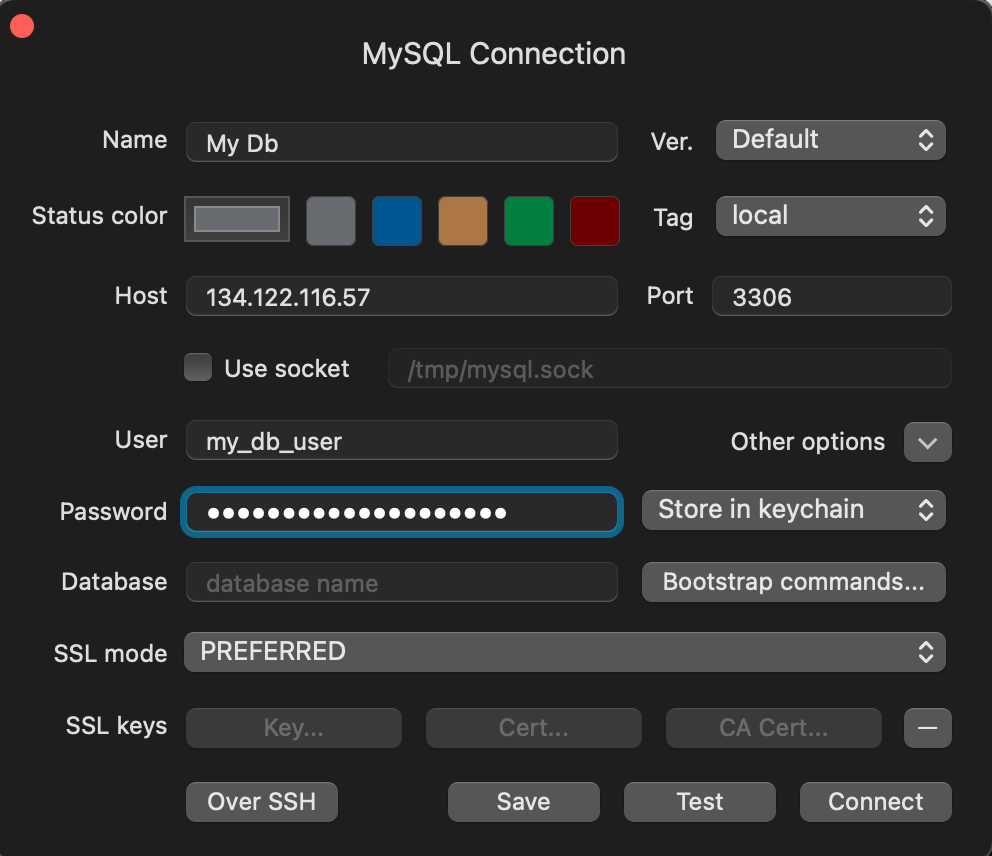
Connecting to Database VIA GUI Client
It’s common to connect to your database remotely via a GUI client, like TablePlus.
To do this, you will need:
- server IP address
- database hostname
- database username
- database user password
All can be found in Dotnet Engine except for your database user password, which will be emailed to you.